Showing posts with label Imagi-nations. Show all posts

Monday, June 5, 2023

Adding To The Range

It has been a while since posting here.  Life and other hobbies have been taking precedence, but I’ve been working on some additional models and thought I’d share some preliminary looks. I was approached by someone who wanted me to adapt my colonial models to Napoleonic.  I already had tricorne wearing forces from the Great Northern War that might work all the way up to the Revolutionary War. Side note, I have been working on grenadier miters for them but haven’t found anything that I really like yet.  The Napoleonic project should fit between the two other ranges nicely.  Because they are designed to form a solid block, I think their best use case would be to represent large formations of troops in games where other games would have several thousand men represented by a single figure.  Not being required to paint over 50% of each figure would allow a good painter to rapidly get a game-ready force together.

Colonial, Napoleonic, and 18th Century Line Infantry

Making the change from Colonial to Napoleonic has been simple enough so far.  The body, head, legs, arms (to include cuffs), and all of the weapons are completely reused from other projects.  I simply created a shako out of a cylinder and a severely slanted cylinder for the brim, merging the spaces between to complete the shako.  Embossed insignia provides some national distinction.  The “client”/requestor intends to use them in an imagi-nation setting so getting the details correct on a Belgic Shako vs. the French pattern are not important now.  That level of differentiation might be important in the future, but not today.  The coat’s turnbacks and iconic crossed belting will have to be painted if required.  I have also flared the cannon’s profile to be more reminiscent of the time period.  This remade cannon profile will be re-used for the 18th century forces as well.  I would like for the range to eventually include differentiated shakos, bearskins, cavalry helmets, and packs for the infantry.  More exoctic Hussar, Landwehr, Hannovarian uniforms might be possible if significant interest materializes. For now, the "client" only wants troops wearing Shakos.  

Saber Cavalry, Field Artillery, Light Infantry, Line Infantry, Lance Cavalry

For a more detailed explanation of my thought process behind how I design/model my simplified and exaggerated models, pick up a copy of the Second Portable Wargame Compendium.  Bob Cordery was generous enough to publish an article of mine in the 3D printing portion.  I hope it will be my most widely-read work to date. 


Wednesday, January 2, 2019

Battle at the Bend

This battle was fought the week before Christmas, but due to traveling and celebrating with family, the report is late.  Our story left off with the Red Army reeling after two close defeats at the hands of the Army of the Five Rivers.  The Red Army has retreated to the outskirts of the royal city and are making preparations for the inevitable invasion.
The Army of the Five Rivers' Light Column and an untested standard column would fight for the Rivermen.  One of the irregular units in the light column enters the battle weakened from previous actions.  Their general, having successfully masterminded two victories, has gained enough experience to shake his incompetencies in command.
The Kingdom of Five Rivers' Order of Battle
The Red Army was able to replenish all of their existing units with motivated patriots from the Royal City.  Their eliminated units were not able to be reinstated and the cavalry column would fight without one of its regular cavalry units.
The Red Kingdom's Order of Battle
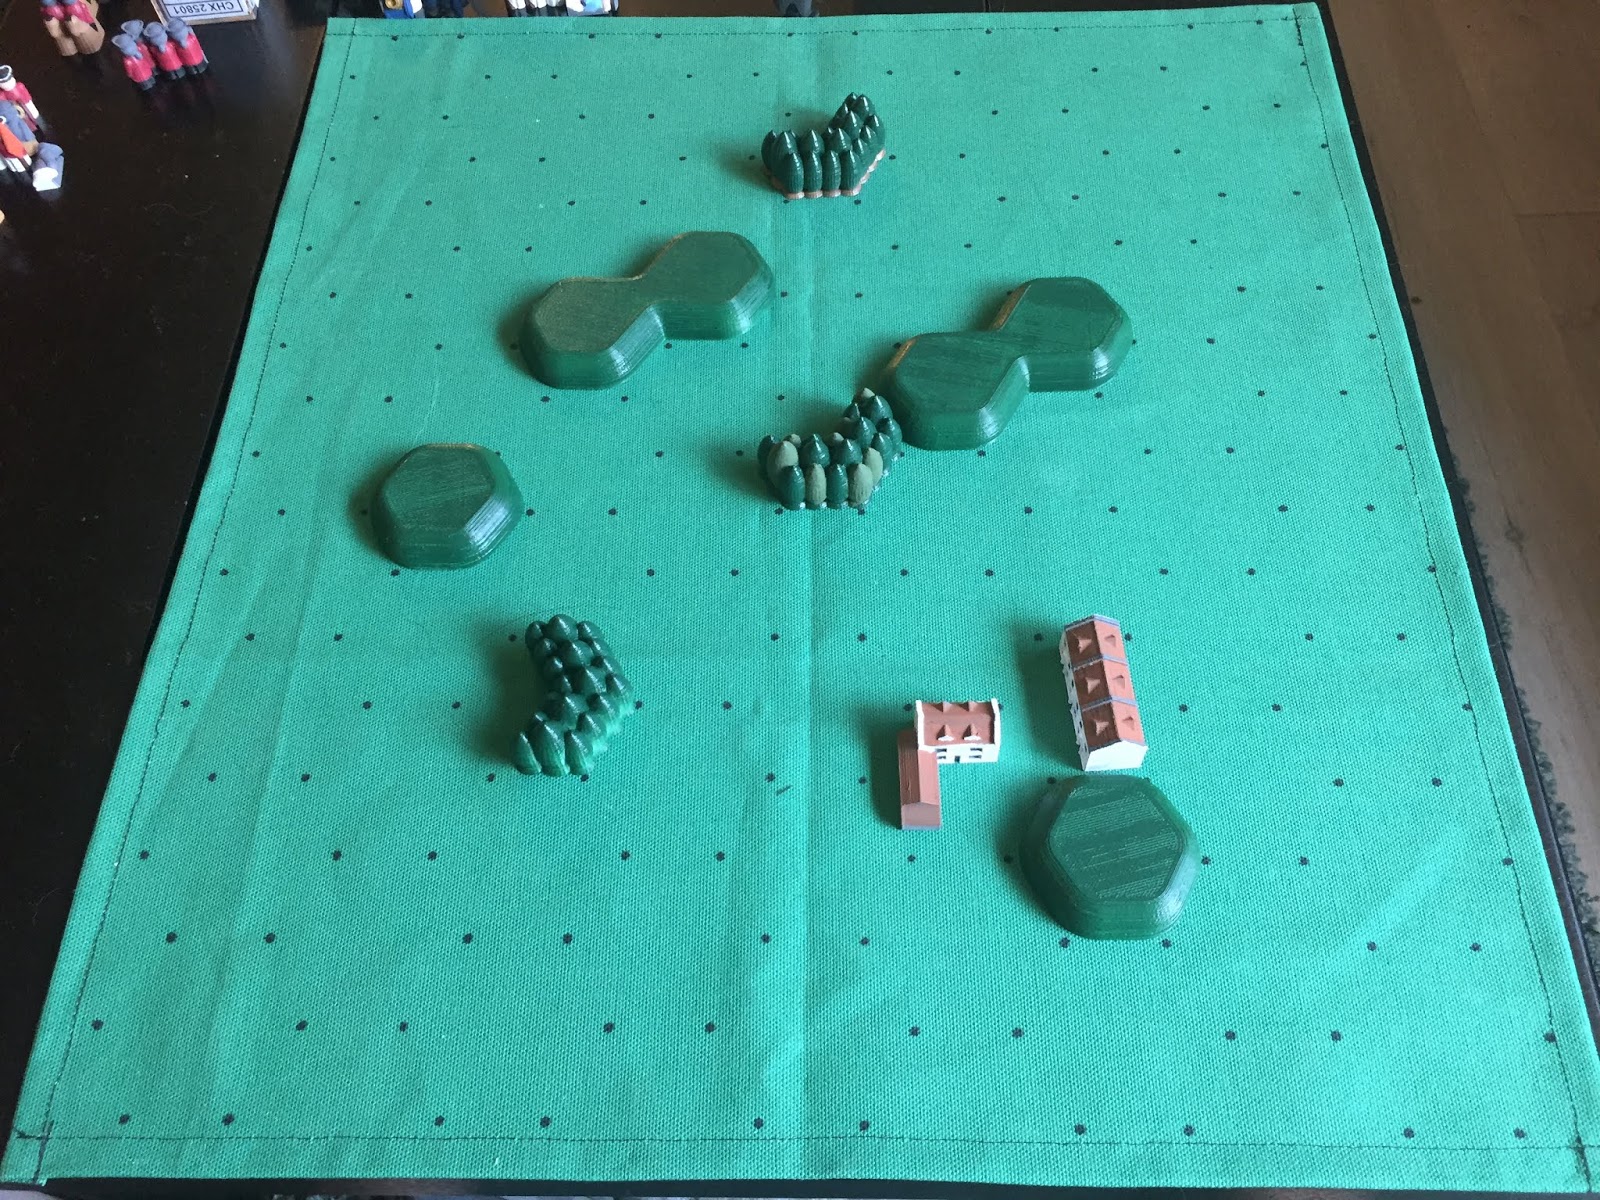
The two forces met along a bend in the central river.  A significant hill and village fortified the inside of the bend, while a wealthy orchard stood out against the otherwise level field of the outside bend.
A field just outside the Red Kingdom's capital
The Red Army took up a position on the hill on the outside bend, while the Rivermen race to take cover in the orchard and use the river to anchor their flank.
Positions at the end of Turn 1
The Red Army took advantage of its superior mobility and attempted to encircle the Rivermen as they advance to take the orchard and the buildings.  The Red cavalry took fire from the irregulars in the orchard.
Positions at the end of Turn 2

Both sides bombard the other to no effect.  The Red Infantry was able to anchor its right flank on the bend in the river and exchanged volleys with the enemy infantry garrison in the farmhouse.  Both sustained significant damage, but the Rivermen Infantry's morale was bolstered by the sight of their general and they retained their composure.  The Highlander unit in the orchard continued to fire on the Red Cavalry, pushing them back.
Positions at the end of Turn 3
The Red Army's dragoons moved into the village inside the bend, leaving their horses to take up defensive positions in the buildings.  This put the dragoons in position to fire on the artillery across the river.  The regulars on the line of battle continued to exchange volleys.  The Red Army's regulars fled as their ranks splintered.  The militia next to the fleeing regulars panicked and lost their sense of order.  The Rivermen line suffered losses on their left flank as well.
Positions at the end of Turn 4
Seeing the Red dragoons in the village the Rivermen artillery unit redirected its fire and began bombarding the village, causing disorder in the ranks of the dragoons.  En masse, the Red Army panics.  Each of its units fail to inflict serious damage on the enemy.  The cavalry on the flank reposition themselves towards the hill as the Red General attempts to rebuild a line with the elevated artillery position in the center.  The artillery unit in the lowlands was forced to move away from fire and was forced into the ford.  They were able to limber their guns and bring them with them.
Positions at the end of Turn 5
The Red General became overwhelmed with his troops positions and hesitated.  Fortunately for him, the artillery colonel did not lose his nerve and was able to direct his battery to deliver a punishing blow to the main line of the Rivermen, causing the disordered regular unit to retreat.  The highlander unit in the orchard advance through the treeline to engage the Red army as it consolidated its position around the small hill.  The artillery unit forced into the ford was able to establish a hasty position, but the gunners were disordered.
Positions at the end of Turn 6
Their seemed to be a lull in the battle as only the artillery played a decisive role as the infantry on both sides rested.  The Riverman battery forced the dragoons in the village to retreat as their reinvigorated cavalry charged the highlander unit in the orchard, but were slowed by the dense plantings.  The highlander unit held the orchard with minimal losses.
Positions at the end of Turn 7
The otherwise uninvolved Noble Cavalry of the Rivers seeing that the battle may end without their involvement charged forward to engage the Red Cavalry, but they were forced back under targeted fire from the orchard.  The Red Army's general began attempting to rally his flagging troops instead of ordering further attacks.
Positions at the end of Turn 8
The General of the Five Rivers ordered his line infantry forward to attack the exposed Red Cavalry.  After the Noble Cavalry of the Five Rivers and the exhausted highlander unit in the orchard failed to route the Red Cavalry, the line infantry was ordered to turn to face the cavalry.  They delivered a fatal volley causing the Red Cavalry to flee the field.  The regulars of the Red Army fire and advance between the river and the hills.
Positions at the end of Turn 9
The Noble Cavalry and Rivermen Infantry continued their advance to assault the hill.  The Red Line pivoted to meet the threat. The artillery on the hill and the regulars missed their target.  The Rivermen pushed forward towards the hill, ready to end the battle with a decisive bayonet charge.
Positions during Turn 10
The Noble Cavalry in an act of self aggrandizement charged the militia band to the right of the hill, routing the untrained and terrified troops.  The regulars assaulted uphill towards the Red battery, forcing them to withdraw to the far side of the hill.  From their new position, they would have a good shot at any enemy that attempted to use the ford.  This position allowed the regulars and general to flee across the river under a hail of gunfire to mount a last stand inside the bend rallying the dragoons.
Positions at the end of Turn 10
The battle ended as the battery outside of the bend was overran.  The Red Army surrendered with all of its remaining units disordered.  In their last stand, they were able to cause disorder in one of the regular infantry units. 
Positions at the end of Turn 11
The Red King's army has been defeated in the field.  After the conclusion of the battle, negotiators met on the River King's palatial barge to work out a peace treaty.  The Red Kingdom will surrender its northern territorial holdings to the Kingdom of the Five Rivers.  Furthermore, the Red King was forced to admit to plotting the murder of the The King of the Five Rivers and creating the succession crisis that caused the war.

Sunday, November 18, 2018

Pressing the Attack

After successfully halting the Red Army's advance, The King of the Five Rivers ordered his army to press into the Red Kingdom.  The fleeing red army was caught mustering just outside of a hillside town near a strategic ridge.  Since the last battle, the Red Army was able to replace a unit of dragoons lost in the previous battle.  Their army remained somewhat bruised.  Two regiments of regular foot were unable to replenish their losses and the third regular regiment was dissolved after immense losses.  The Army of the Five Rivers did not suffer near as significant casualties, but one cavalry regiment and one regiment of foot continued the campaign significantly under manned.
Town in Red Kingdom, just south of the foothills
The Red Army's recruitment efforts were in vain as their newly reformed dragoon unit's column would not be participating in this battle.  The Army of the Five Rivers fielded the same columns from the previous battle, hoping to repeat their success.

Red Army's Order of Battle
Army of Five Rivers's Order of Battle

The Rivermen descended through the foothills to meet the Red Army who have decided to defend the town with infantry and use their superior number of guns to batter the Rivermen as they come out of the hills.  Meanwhile, the Army of the Five Rivers has decided to take up defensive positions on the far hill, with their artillery able to bombard the Red Army's left flank.

Positions at the end of turn 2
The opening salvos of artillery proved generally ineffective for both sides, despite the Rivermen's general putting his battery in a better position.  Enticed by the prospect of charging an irregular infantry unit, the Red cavalry swept wide into the Rivermen's exposed left flank.  

Positions at the end of turn 3
Poorer tribes of the Five Rivers generally organize their troops into Highlander units, choosing to emphasize individual marksmanship over drilled maneuver.  Shooting from the forests, one Highlander band took pot shots at the Red Army's general, to no effect.  Seeing the Red infantry advancing and fearing a cavalry charge, the other Highlander band retreated to the safety of a nearby wood.
Positions at the end of turn 4
The Red Army's artillery continued to be ineffective against the Rivermen's artillery positioned on the far hill, but the Rivermen's artillery shelled the dismounted dragoon unit on the Red Army's left flank.  The far left flank of the Rivermen line advanced and fired a fatal volley to the dragoons as they threw down their muskets and fled.  The Rivermen line also caused panic and disorder in the regiment of horse on the hill, while the forward highlander band was able to cause disorder in the regiment of foot with the Red general attached. After sustaining a downhill cavalry charge, the highlanders were forced out of the forest by a determined militia.  While distracted by the action in the center-right, the general of the Army of the Five Rivers failed to notice a regiment of horse swinging towards his right flank. 

Positions at the end of turn 5

As the bloody day wore on, the Rivermen's artillery on the hill continued to batter the Red Army.  The battery fired on the only remaining regiment of Red foot.  A cannonball bounced through the line, striking the enemy general in the chest.  The regiment panicked and fled the field, carrying their general's body on the back of his horse.  In a fit of rage, and attempting to regain the initiative, the cavalry in the Rivermen's flank charged a regiment of foot from the rear, causing a retreat away from the cavalry and towards the Red lines.  Seeing the panicking regulars advance towards their position, the town's militia fire a crippling volley as the regulars turn and run.  Seeing the panic in the Red Army at the loss of his counterpart, the Rivermen general orders a general advance of his remaining line infantry.  The regiment on the far right squares up on the successful Red cavalry. Their volley causes the cavalry line to fall to disorder and ride out of range.  

Positions at the end of turn 6
The battery defending the right side of what remained of the Red finally saw some success as it fired and enfilading volley at the right-most regiment of the Rivermen line.  The Rivermen's apparently invincible artillery survived a rear charge from a regiment of foot, but did become disordered.
Positions at the end of turn 7

Both batteries continued to be effective as the forwardmost highland band was forced to retreat from the woods and the regiment of horse, sent to bolster the militia, sustained significant casualties.  Having kept the cavalry in reserve, The fresh Rivermen cavalry delivered a fatal charge to the flagging enemy cavalry.  Seeing their cavalry flee, the remnants of the Red Army turned and ran downriver towards their capitol.


Monday, November 12, 2018

Battle at the Border

As the Red King's Army crossed the border, The new King of the Five Rivers mobilized his forces and sent them south to meet the invaders.  The two armies met outside of a small farm near the border.  The Army of the Five Rivers was determined to defend the farm and repel the attack.
Before the armies arrived
 As the armies meet, they deploy into battle lines.  The cautious Red Army's general locates himself with his battery, while his daring opponent occupies the farmhouse to assure the citizens that all well be ok. In the opening moves, The Five Rivers' artillery opens fire on the Red Army's right flank, causing disorder in the regular infantry's ranks and causing a retreat onto higher ground.  The Five Rivers' impetuous cavalry attempted to finishes off the disordered infantry but was disordered and subsequently retreated away from the the Red lines under withering fire. Depleted of momentum and suffering heavy casualties, they would run from the battlefield.
Position at the end of Turn 4

As the battle progressed, the lines solidified and as infantry exchanged volleys.  The Red Dragoons remounted their horses and attempted to flank the enemy's infantry, but are thwarted by the stalwart northern line infantry.  The northern general vacated the farmstead, choosing to reinforce his irregulars on the front lines.  He orders the artillery on his left flank onto the hills to gain an advantage over his enemy between the hills, but things aren't looking too good for the Red Army either, as both of their right flank regular regiments have fled and militia has been called up to secure the flank.
Positions at the end of Turn 6.
Red's Dragoons continued to harass and disorder their enemy's right flank, causing panic and disorder, but taking some losses themselves.  The Army of the Five River's left flank continues to take losses from close range artillery fire.  Although more of the Red Army's units have fled, they appear to be in a much better position.  The Army of the Five Rivers' lines are broken, their weak in melee irregular troops are exposed, and their cavalry have fled, leaving them exposed to artillery barrage.
Positions at the end of Turn 7
The Rivermen's general expertly commanded his right flank infantry and routed the enemy dragoons. After losing the dragoons, The Red general ordered the militia to advance and destroy the Rivermen's battery on the hill.  They came under fire from both the militia on the hill and the Rivermen line infantry which had been fought back into cover of the farmstead.
Positions at the end of Turn 9
Things are looking very grim for the Rivermen at the conclusion of Turn 9.  Their lines have almost collapsed backwards on themselves and the Red battery remains intact.  The Red general, eager to exploit the broken lines sends a unit of regular infantry around the hill on his left flank in an attempt to replicate the success of the now routed dragoons.
Positions at the end of Turn 12 Final
The infantry attack around the hill was not meant to be.  The Army of the Five Rivers' general anticipated it and positioned a unit of irregulars on the hill where they would be less vulnerable to a bayonet charge.  They and their other infantry counterparts were able to route the would be flanking force.  At this point the Red Army lost its will to continue the fight.  Their general ordered a general retreat.

Sunday, November 11, 2018

Campaign Setup

Having played one game of the campaign, I figured I should write the setup and first battle report before moving on to the second. Being a mapless campaign with miniatures not painted with any historical force in mind, I suppose this will be a Imagi-Nation Campaign.

Somewhere on a largely fictional continent, many small streams flow out of a largely impassable mountain range and flow into a mighty river, ultimately reaching the sea in a protected harbor. The lower half of the river is held by the Red King.  The lower river valley is fertile and relatively flat, allowing for massive cash crop plantations and horse breeding farms.  Being a rich and largely agricultural kingdom, the Red King's army relies heavily on its cavalry.  The majority of the working class men are needed to ensure an abundant harvest. The Red Kingdom's army, in local custom, is made up of three columns of four units.
The first column, a cavalry column: 2x cavalry regiments, 1x artillery battery, and 1x dragoon regiment.
The second column, an infantry column: 2x regular foot regiments, 1x provincial militia, and 1x artillery battery.
The third column, an infantry column: 1x dragoon regiment, 2x regular foot regiments, and 1x provincial militia.

Upstream of the Red Kingdom's fertile fields lie the mountains, forests, and tributaries of the Kingdom of Five Rivers.  Although the main river carries the wealth of the upper kingdom to markets, the majority of the wealth comes from the higher elevations.  The Kingdom of Five Rivers was not always unified under a single dynasty.  Steep mountain cliffs isolate the upstream tributaries, leaving the people who live along the banks of the tributaries dependent on the rivers for transportation around the mountains and to other valleys.  The Army of the Five Rivers mirrors relative isolation of the tribes which settled on the upper tributaries.  Each of its columns retains some ties to the tribes from which it is drawn.
The first column, from a wealthy southern tribe: 1x cavalry contingent, 1x regular foot regiment, 1x citizen militia, and 1x artillery battery.
The second column, from a northern tribe: 1x cavalry contingent, 1x regular foot regiment, 1x citizen militia, and 1x artillery battery.
The third column, from highland rabble: 2x regular foot regiment and 2x irregular infantry contingents.

The Red Kingdom and the Kingdom of Five Rivers find themselves at war.  Several years ago, in an attempt to usher in a period of cooperation and mutual prosperity, the Crown Prince of the Five Rivers was married to The Red King's eldest daughter.  Shortly after ascending to his father's throne and before producing an heir, the young king was found dead in his palace.  The Council of Chiefs convened to determine the young king's successor. The council selected the deceased king's cousin, but the Red King believing his daughter to be the rightful ruler of the Five Rivers sent an envoy to convince the Council of Chiefs to install his daughter as queen.  On the deceased king's cousin's coronation day, the Red Army crossed its borders, prepared to install their princess as ruler of the Five Rivers, by force if necessary....