Sunday, December 9, 2018

New Printer!

I know I have left my campaign hanging on the potentially last battle, but I think I have a good reason.  The distractions of tuning the new printer and printing some upgrades for it have been taking my hobby time. I just got a new 3D printer and have been busy designing terrain to make the next battle special.  The campaign has happened along the banks of a river system that forms the backbone of two rival kingdoms, but the river has not appeared on the battlefield yet.  My new printer is currently working on modular river systems.  The modular river sections are featured below.  They're designed to span the 2" hexes I’ve been using. I'm also designing a palace to use as a built-up-area for the upcoming battle in the capitol region. The picture below is the tentative location for the upcoming battle.  It has not yet been decided where each side will deploy from. 


I also bought Bob Cordery's Gridded Naval Wargames, and have been daydreaming about modifying it for ancient galleys. I had been designing ships for use with Galleys and Galleons by Ganesha Games, but stopped due to the large size required for play and disappointment in designing sails.  Ancient galleys, from what I've read, often ditched their masts and sails before combat, eliminating the frustrating design challenge.  As good as the ancient galleys sound, they don't fit with the 18th century nations in my current campaign.  I've been looking at the Swedish galleys, and might create an opportunity for the nations in the campaign to fight small naval actions.  Being riverine countries, they should have some naval capability.  Hopefully I'll be able to shake the distractions and fight the next battle next weekend.  If not, it might not happen until after the new year.

Sunday, November 18, 2018

Weekend Game

I am attempting to keep the storyline of my first 18th Century Imagi-nation free of of commentary, so will make separate commentary posts.  I'm using v1.6 of the rules posted to the "Pages" section of this blog.  I have found significant errata which I have marked in my printed copy.
There are two errors  in the table outlining results of rolls.  The categories should read "6 or less", "7 to 9", and "10 or more".  Also artillery should have a base shooting value of 0, since they have been penalized for targeting units beyond 1/2 of their max range.  Previously they had a bonus for close-in shooting, but a base value of -1.
From playing the 2nd campaign game I learned:
Don't take a break until a turn is completely finished.  I think I might have shorted Red their half of a critical turn.  That could have been significant in their loss.......
Artillery can be extremely effective if used correctly and defended.
Cavalry is very effective.  Perhaps a negative modifier should be applied when frontally charging professional infantry.
Having more initiative points is both a blessing and a curse.  In the early part of game 2, Red rolled for initiative much better.  Maybe it was my poor generalship, but it seems that I over-extended the Red lines, while Blue sat in a defensive position and waited for their opportunity.
Keeping the general alive is crucial.  Without a general, all activations cost 2 initiative points and rallying is impossible.  The momentum might have been with Blue when Red's general was eliminated, but it was essentially a done-deal after.
I need to write down conditions for ending a battle.  In the campaign games, I have been using the elimination of more than 1/2 of the units.  I have not been counting the general in the count.
I am always open to questions/comments about the rules.  If you ever play a game using my rules, or have questions about the miniatures, please reach out.

A few pictures taken, but not used in game 2.
Red's cavalry rolls modified 10+ causing disorder and retreat

Militia (gray) rolls modified 10+ and eliminates regular infantry

Pressing the Attack

After successfully halting the Red Army's advance, The King of the Five Rivers ordered his army to press into the Red Kingdom.  The fleeing red army was caught mustering just outside of a hillside town near a strategic ridge.  Since the last battle, the Red Army was able to replace a unit of dragoons lost in the previous battle.  Their army remained somewhat bruised.  Two regiments of regular foot were unable to replenish their losses and the third regular regiment was dissolved after immense losses.  The Army of the Five Rivers did not suffer near as significant casualties, but one cavalry regiment and one regiment of foot continued the campaign significantly under manned.
Town in Red Kingdom, just south of the foothills
The Red Army's recruitment efforts were in vain as their newly reformed dragoon unit's column would not be participating in this battle.  The Army of the Five Rivers fielded the same columns from the previous battle, hoping to repeat their success.

Red Army's Order of Battle
Army of Five Rivers's Order of Battle

The Rivermen descended through the foothills to meet the Red Army who have decided to defend the town with infantry and use their superior number of guns to batter the Rivermen as they come out of the hills.  Meanwhile, the Army of the Five Rivers has decided to take up defensive positions on the far hill, with their artillery able to bombard the Red Army's left flank.

Positions at the end of turn 2
The opening salvos of artillery proved generally ineffective for both sides, despite the Rivermen's general putting his battery in a better position.  Enticed by the prospect of charging an irregular infantry unit, the Red cavalry swept wide into the Rivermen's exposed left flank.  

Positions at the end of turn 3
Poorer tribes of the Five Rivers generally organize their troops into Highlander units, choosing to emphasize individual marksmanship over drilled maneuver.  Shooting from the forests, one Highlander band took pot shots at the Red Army's general, to no effect.  Seeing the Red infantry advancing and fearing a cavalry charge, the other Highlander band retreated to the safety of a nearby wood.
Positions at the end of turn 4
The Red Army's artillery continued to be ineffective against the Rivermen's artillery positioned on the far hill, but the Rivermen's artillery shelled the dismounted dragoon unit on the Red Army's left flank.  The far left flank of the Rivermen line advanced and fired a fatal volley to the dragoons as they threw down their muskets and fled.  The Rivermen line also caused panic and disorder in the regiment of horse on the hill, while the forward highlander band was able to cause disorder in the regiment of foot with the Red general attached. After sustaining a downhill cavalry charge, the highlanders were forced out of the forest by a determined militia.  While distracted by the action in the center-right, the general of the Army of the Five Rivers failed to notice a regiment of horse swinging towards his right flank. 

Positions at the end of turn 5

As the bloody day wore on, the Rivermen's artillery on the hill continued to batter the Red Army.  The battery fired on the only remaining regiment of Red foot.  A cannonball bounced through the line, striking the enemy general in the chest.  The regiment panicked and fled the field, carrying their general's body on the back of his horse.  In a fit of rage, and attempting to regain the initiative, the cavalry in the Rivermen's flank charged a regiment of foot from the rear, causing a retreat away from the cavalry and towards the Red lines.  Seeing the panicking regulars advance towards their position, the town's militia fire a crippling volley as the regulars turn and run.  Seeing the panic in the Red Army at the loss of his counterpart, the Rivermen general orders a general advance of his remaining line infantry.  The regiment on the far right squares up on the successful Red cavalry. Their volley causes the cavalry line to fall to disorder and ride out of range.  

Positions at the end of turn 6
The battery defending the right side of what remained of the Red finally saw some success as it fired and enfilading volley at the right-most regiment of the Rivermen line.  The Rivermen's apparently invincible artillery survived a rear charge from a regiment of foot, but did become disordered.
Positions at the end of turn 7

Both batteries continued to be effective as the forwardmost highland band was forced to retreat from the woods and the regiment of horse, sent to bolster the militia, sustained significant casualties.  Having kept the cavalry in reserve, The fresh Rivermen cavalry delivered a fatal charge to the flagging enemy cavalry.  Seeing their cavalry flee, the remnants of the Red Army turned and ran downriver towards their capitol.


Monday, November 12, 2018

Battle at the Border

As the Red King's Army crossed the border, The new King of the Five Rivers mobilized his forces and sent them south to meet the invaders.  The two armies met outside of a small farm near the border.  The Army of the Five Rivers was determined to defend the farm and repel the attack.
Before the armies arrived
 As the armies meet, they deploy into battle lines.  The cautious Red Army's general locates himself with his battery, while his daring opponent occupies the farmhouse to assure the citizens that all well be ok. In the opening moves, The Five Rivers' artillery opens fire on the Red Army's right flank, causing disorder in the regular infantry's ranks and causing a retreat onto higher ground.  The Five Rivers' impetuous cavalry attempted to finishes off the disordered infantry but was disordered and subsequently retreated away from the the Red lines under withering fire. Depleted of momentum and suffering heavy casualties, they would run from the battlefield.
Position at the end of Turn 4

As the battle progressed, the lines solidified and as infantry exchanged volleys.  The Red Dragoons remounted their horses and attempted to flank the enemy's infantry, but are thwarted by the stalwart northern line infantry.  The northern general vacated the farmstead, choosing to reinforce his irregulars on the front lines.  He orders the artillery on his left flank onto the hills to gain an advantage over his enemy between the hills, but things aren't looking too good for the Red Army either, as both of their right flank regular regiments have fled and militia has been called up to secure the flank.
Positions at the end of Turn 6.
Red's Dragoons continued to harass and disorder their enemy's right flank, causing panic and disorder, but taking some losses themselves.  The Army of the Five River's left flank continues to take losses from close range artillery fire.  Although more of the Red Army's units have fled, they appear to be in a much better position.  The Army of the Five Rivers' lines are broken, their weak in melee irregular troops are exposed, and their cavalry have fled, leaving them exposed to artillery barrage.
Positions at the end of Turn 7
The Rivermen's general expertly commanded his right flank infantry and routed the enemy dragoons. After losing the dragoons, The Red general ordered the militia to advance and destroy the Rivermen's battery on the hill.  They came under fire from both the militia on the hill and the Rivermen line infantry which had been fought back into cover of the farmstead.
Positions at the end of Turn 9
Things are looking very grim for the Rivermen at the conclusion of Turn 9.  Their lines have almost collapsed backwards on themselves and the Red battery remains intact.  The Red general, eager to exploit the broken lines sends a unit of regular infantry around the hill on his left flank in an attempt to replicate the success of the now routed dragoons.
Positions at the end of Turn 12 Final
The infantry attack around the hill was not meant to be.  The Army of the Five Rivers' general anticipated it and positioned a unit of irregulars on the hill where they would be less vulnerable to a bayonet charge.  They and their other infantry counterparts were able to route the would be flanking force.  At this point the Red Army lost its will to continue the fight.  Their general ordered a general retreat.

Sunday, November 11, 2018

Campaign Setup

Having played one game of the campaign, I figured I should write the setup and first battle report before moving on to the second. Being a mapless campaign with miniatures not painted with any historical force in mind, I suppose this will be a Imagi-Nation Campaign.

Somewhere on a largely fictional continent, many small streams flow out of a largely impassable mountain range and flow into a mighty river, ultimately reaching the sea in a protected harbor. The lower half of the river is held by the Red King.  The lower river valley is fertile and relatively flat, allowing for massive cash crop plantations and horse breeding farms.  Being a rich and largely agricultural kingdom, the Red King's army relies heavily on its cavalry.  The majority of the working class men are needed to ensure an abundant harvest. The Red Kingdom's army, in local custom, is made up of three columns of four units.
The first column, a cavalry column: 2x cavalry regiments, 1x artillery battery, and 1x dragoon regiment.
The second column, an infantry column: 2x regular foot regiments, 1x provincial militia, and 1x artillery battery.
The third column, an infantry column: 1x dragoon regiment, 2x regular foot regiments, and 1x provincial militia.

Upstream of the Red Kingdom's fertile fields lie the mountains, forests, and tributaries of the Kingdom of Five Rivers.  Although the main river carries the wealth of the upper kingdom to markets, the majority of the wealth comes from the higher elevations.  The Kingdom of Five Rivers was not always unified under a single dynasty.  Steep mountain cliffs isolate the upstream tributaries, leaving the people who live along the banks of the tributaries dependent on the rivers for transportation around the mountains and to other valleys.  The Army of the Five Rivers mirrors relative isolation of the tribes which settled on the upper tributaries.  Each of its columns retains some ties to the tribes from which it is drawn.
The first column, from a wealthy southern tribe: 1x cavalry contingent, 1x regular foot regiment, 1x citizen militia, and 1x artillery battery.
The second column, from a northern tribe: 1x cavalry contingent, 1x regular foot regiment, 1x citizen militia, and 1x artillery battery.
The third column, from highland rabble: 2x regular foot regiment and 2x irregular infantry contingents.

The Red Kingdom and the Kingdom of Five Rivers find themselves at war.  Several years ago, in an attempt to usher in a period of cooperation and mutual prosperity, the Crown Prince of the Five Rivers was married to The Red King's eldest daughter.  Shortly after ascending to his father's throne and before producing an heir, the young king was found dead in his palace.  The Council of Chiefs convened to determine the young king's successor. The council selected the deceased king's cousin, but the Red King believing his daughter to be the rightful ruler of the Five Rivers sent an envoy to convince the Council of Chiefs to install his daughter as queen.  On the deceased king's cousin's coronation day, the Red Army crossed its borders, prepared to install their princess as ruler of the Five Rivers, by force if necessary....

Minor Change of Plans

As stated in my last post, we had planned on being camping this weekend.  We live in Southern California which has generally comfortable weather, but is somewhat prone to forest fires in the dry seasons.  Thursday evening a small fire broke out in the hills on the way to the campground we had reservations for.  By Friday afternoon the interstate we had planned on taking was shut down and it looked like the alternate route would be impacted shortly.  Friday at noon the fire was 8,000 acres, by 2 PM on Friday the fire had grown to 14,000.  As I type early Sunday morning it is now 80,000 and within 5 miles of the campsite we had booked.  So as you may have guessed, we stayed home.  Although we thoroughly enjoy camping and haven't gotten out as much as we would like, we're safe at home and upwind of most of the smoke plume (for now).
Staying home means progress on the wargames front though.  Late Wednesday my lovely wife sewed the edges of a small piece of duck cloth.  I then used a template and permanent marker to mark the corners of the hexagons for the map.  There are 9 rows of 8 or 9 hexagons.  Close ups of mat below.
Close up of mat with partially painted miniatures

Mat on coffee table

Template made from 4 pieces of printer paper taped together


Mat on an End Table (How's that for Compact!)
I am satisfied with the outcome of this mat.  I think it will serve me well for the foreseeable future.  I did realize as I was drawing the dots that only a few more rows and I would have had a mat compatible with a compact Commands and Colors map.  I do have enough scrap to make another that would be compatible, assuming I stick with 2" hexes. 

Wednesday, November 7, 2018

Tug-O'-War Campaign

This campaign setup is based on Bluebear Jeff's (saxe-bearstein.blogspot.com) work.  I have hopefully reduced the number of games that would be played in the campaign to increase the likelihood that I can make it through a campaign in a weekend.  I will be making a campaign supplement to my rules and using this as a starting point. 
For the campaign I will try to fight this weekend each nation will have at their disposal: 4 regular, 2 militia, 2 cavalry, 2 artillery, and 2 dragoon units.  These units will be divided up into 3 columns of four units, per v1.6 rules.  In each game only 2 columns will engage.  The third column will still have the chance to move disordered troops to ordered as described in the rough draft of a maples campaign ruleset below. 


A simple mapless campaign can be devised using a tug-o-war mentality.  The “front lines” begin at the center of the five positions.  A battle is fought at this position.  The winner moves the “front lines” marker one position closer to the opponent’s baseline. 


After every battle: All eliminated or disordered units roll 1D6.  Units move from eliminated to disordered to ordered by one position if; Units on winning side roll 3+, Units on losing side roll 4+.  Eliminated units which fail to move to disordered are permanently eliminated from the campaign.  Disordered units carry their disorder to the following battle.  Winner will choose which side to play in following game.
Attacking the enemy's position B: The defending force receives 1 new unit at full strength.
Attacking the enemy's position C: The defending force receives 1 new unit at full strength, and all disorder is removed. 
Any winner of 2 consecutive battles: Choose 1 new unit or remove all disorder from existing troops.
Any winner of 2 consecutive battles:  Commander is upgraded one position towards elite.
Any loser of 2 consecutive battles:  Commander is downgraded one position towards incompetent. 

Determined to Get Some Games In


I’m going camping on the beach this weekend and think I’ll have some time for a series of games.  v1.6 seems stable enough that I could probably manage a small campaign over the course of a camping weekend.  I’ve got a red army and a blue army somewhat painted.  Each features 4 regular infantry, 2 cavalry, 2 artillery, 2 dragoon, and 2 irregular units with 4 militia units unassigned to any particular army.  The dragoons, irregulars, and militia are in various states of paint, with some being near completion and others mostly primer gray. 


I have also been busy on the terrain front.  I have digitally designed and printed prototypes for hills, forest, forested hills, 3 types of built-up-areas, a road system, a river system, and the fords/bridges to make the two work together.  Unfortunately, my 3d printer had a malfunction that caused a part to fail.  The part is relatively cheap on its own, but my printer is a few years old, and the newer models can get very good quality at a lower price.  I have convinced myself that if I could sell my existing printer at a reasonable price, I would buy a new printer.  The new printer should be less likely to nickel and dime me on repairs like my current printer does.  I’ve been attempting to sell my printer, but there doesn’t seem to be much of a market for used printers in my area.  I’m also somewhat concerned that I’m going to lose my printing space in a few months.


Against my better judgement, and ignoring previous experience, I purchased a small piece of green duck cloth and am in the process of sewing the edges to prevent unraveling.  After that is complete I will be marking the corners of the hexes with a permanent marker.  Hopefully there will be enough contrast to make the hexagon pattern easily visible.  I had previously used a large sheet of paper and marked the corners with a pencil, but have decided I’m ready for something a little more permanent.  We’ll see if it turns out better than my last experiment.  Click “Hex Grid Failure” if you want to read about that debacle. 

Tuesday, September 18, 2018

v1.5 After Action Report

I played a game with the new v1.5 rules. I used Scenario Six from One Hour Wargames as a basis.  I quickly converted the map to hexagons and gave each side eight instead of six units.  My wife played the red army, springing a trap on my unsuspecting blue column. 
The game went fairly quickly with the red army rolling abysmally for activations.  The blue column was able to start turning the tide by using cavalry to charge the force blocking the road from their flank.  With nowhere to retreat, the blocking force surrendered and was eliminated.  This compounded the activation problem because the commander was attached to one of the blocking units, which meant that two iniative points were required to activate most of the red force.  Blue took advantage of their iniative point advantage and moved their disordered cavalry off the field, completing the mission objectives.  The game ended with blue successfully escaping with all eight units and destroying four of red's units in the process.


We only had time to play one game, but I wonder if I would have been able to stop blue's advance if I were the red player.  Sorry no pictures from this one.  It took us about two hours to play with frequent breaks to check the rules and there was the constant distraction of the dog who thought we should be playing with her. 


Overall, the game worked pretty well. Artillery felt pretty under powered and cavalry felt overpowered.  I'm probably going to have to reduce the melee starting value for cavalry and mounted dragoons by 1.  I don't know how I'm going to make the artillery more powerful.  My first thought would be to set their base ranged stat at 0 and have a -1 modifier for long shots, but that is statistically identical to having the base stat at -1 and a +1 modifier for close shots.  It might make players feel like the artillery is stronger and use it more.  Another option would be for the artillery to fire using only 1 activation point, even if they are far from the commander or getting a bonus for firing on the same tile as on the previous turn.  This would have the unfortunate consequence of forcing the players to remember where they fired last turn, or cluttering the already often tightly packed tiles with a marker of some sort.   I know historically artillery wasn't really that effective, but I think the four batteries on the field scored a combined total of one effective volley. 
If you have some spare time and wouldn't mind reading or playtesting my rules, I'd greatly appreciate it. 

Tuesday, August 21, 2018

v. 1.4 After Action Report

I played my first full game this Saturday.  It went very smoothly overall.  I want to play a few games solo to work out the kinks before playing with another person. 


I grabbed my copy of One Hour Wargames and found the first scenario that I could field with my current 3D printed terrain.  Scenario 3 was chosen.  Only the map (converted to hex grid), reinforcement, and victory conditions from One Hour Wargames were used.  To determine which units would participate in the battle, the eight units "painted" for each army were lined up and each unit rolled 1D6.  The two units with the lowest score would not arrive in time for the battle.  If three units rolled the same lowest value, those three units would re-roll until two units were identified. 


The game opened with a small contingent of the Red army occupying a strategic hill.  The Blue army marches towards the hill from the west, with orders to force Red off the hill and occupy the strategic terrain. 


The remainder of the Red army races in to defend the hill, but is plagued by confusion among the junior officers (represented by terrible activation rolls).  The first third of the game features some strategic maneuvering and artillery fire, but little significant combat occurred.  Battle lines developed alongside the hill and the clearing between the hill and the forest.  The clearing became significant to keep enemy cavalry from flanking the main lines and attacking the forces assaulting the hill from behind.  The forest served more as a maneuvering block than anything else.


Below are some more pictures.  I got a little caught up in playing the game and forgot to take pictures.  The game ended with the Red army surrendering after losing four of its six original units.  I need to take better notes while playing the game if I'm going to do this more often.  Pictures will be uploaded and added to this post shortly.

Ideas for further improvement:
Artillery should have +1 bonus if on a hill and firing into non-hill.
Follow up attacks for melee occupying vacated tile?
Retreat should be limited to cells non-adjacent to enemy units. 

Thursday, July 12, 2018

Potential Uniform Plates

I've got enough miniatures 3D printed to field one army.  Now I just need to decide how to paint them.  They will all have a very simple paint scheme.  I won't be painting any buttons, sashes, belts, pockets, footwear, satchels, epaulets, or facings because my models don't have any.  The jacket will be one color and the pants will be another.  All tricornes will be black with a white or yellow brim.

Unfortunately I think I'll just be doing a blue army and a red army for now.  I'd like to keep them generic enough that no one looks at them and assumes a nationality, but historic enough that they wouldn't feel out of place.  I really like the look of a green and black uniform, but it doesn't stand out enough against green gaming surfaces and green forests. 

Below are my quick sketches.  I found the template from google, originally on emperor v. elector, and traced the outline in PowerPoint so I could easily fill the simple shapes. 


I appreciate all feedback on the uniforms.  In my actual painting, cuffs, belts, buttons, and scarves will be ignored.  They are included here only for reference.  I'm a little worried that Blue's irregulars and Red's militia aren't different enough.  I hope this is mitigated by the militia model being three soldiers and the irregular model being two soldiers.  I also don't really like how both armies use their color and white for regular/artillery and color and dark for all mounted units.  They seem too standardized to be from different countries.  I tired having a French-style white jacket and colored pants, but it didn't seem like it provided enough space for the national color to be easily recognizable, especially on the mounted and artillery units. 


Tuesday, July 10, 2018

Testing the Rules

I've been editing/tweaking the rules for a while and playtesting as I go.  I printed the models I've designed for Horse and Musket games at 18mm scale.  They were a challenge for my printer.  Their small size tricked the printer into thinking it could go a lot faster than it should.  I manually reduced speed to less than half of my normal printing speed for larger items. 
LINK https://www.thingiverse.com/thing:2956951
I painted some of them with spray primer craft store acrylic paints.  I'm still working on the paint scheme.  I need a way to differentiate the dismounted dragoons, irregulars, and militias from the regulars.  My ruleset does not currently have elite or inferior units, so don't have to worry about making each unit unique.  Perhaps in the future national identities and imagi-nations may develop, but for now they're going to be army red and army blue. 
My lovely wife designed a template for making hexagons with 2" between parallel sides which she cut out of printer paper on her Cricut.  I used the template on a piece of packing paper to make a field 9 rows of 8 or 9 columns of hexes.  This size results in a compact playing  surface of18"x16".  It certainly isn't pretty but it works.  I think I have a piece of 1/8 hardboard laying around somewhere that might work if painted.
I conducted a solo play test to surrender this morning.  Occasionally referencing the rules, it took me just under 45 minutes from deployment to surrender.  The surrendering player did not make an effort to salvage forces by continuing play and retreating units off of the board, choosing to surrender once defeat was inevitable.
Lessons Learned:
Distinguishing unit types from a distance is critical. Irregulars and Dragoons look similar. 
Keeping units near the center of the hex makes determining facing easier.
Keeping track of initiative points is critical.  Solved by keeping dice off board with each pip representing an iniative point. 
Keeping your general alive and relevant is very helpful.  The combat bonuses are important, but the inability to rally can end the game quickly. 
I like that each unit completes its activation before activating another.  This prevents the problem of handling combined attacks.  The only real downside is that a unit could make multiple moves worth of retreated distance. 
Things I Might Change:
Currently two units of regular infantry can form a regiment and execute identical orders as one unit.  This can make their firepower overwhelming.  It makes them seem a little overpowered.
All units get a +1 bonus when attacking militia and a +2 when melee attacking artillery. 
Currently irregulars can engage in melee.  Based on the exact period in history irregulars could represent light infantry which would engage in melee or skirmishers who would not.
Currently artillery can reposition during the battle.  For most of the 18th Century, artillery was largely immobile once the firing began. 


I've done enough tweaks to the rules that I should re-upload them soon.  I'd like to upload them as a PDF.  What is the best way to do this? 

Thursday, May 31, 2018

Rules v2.0

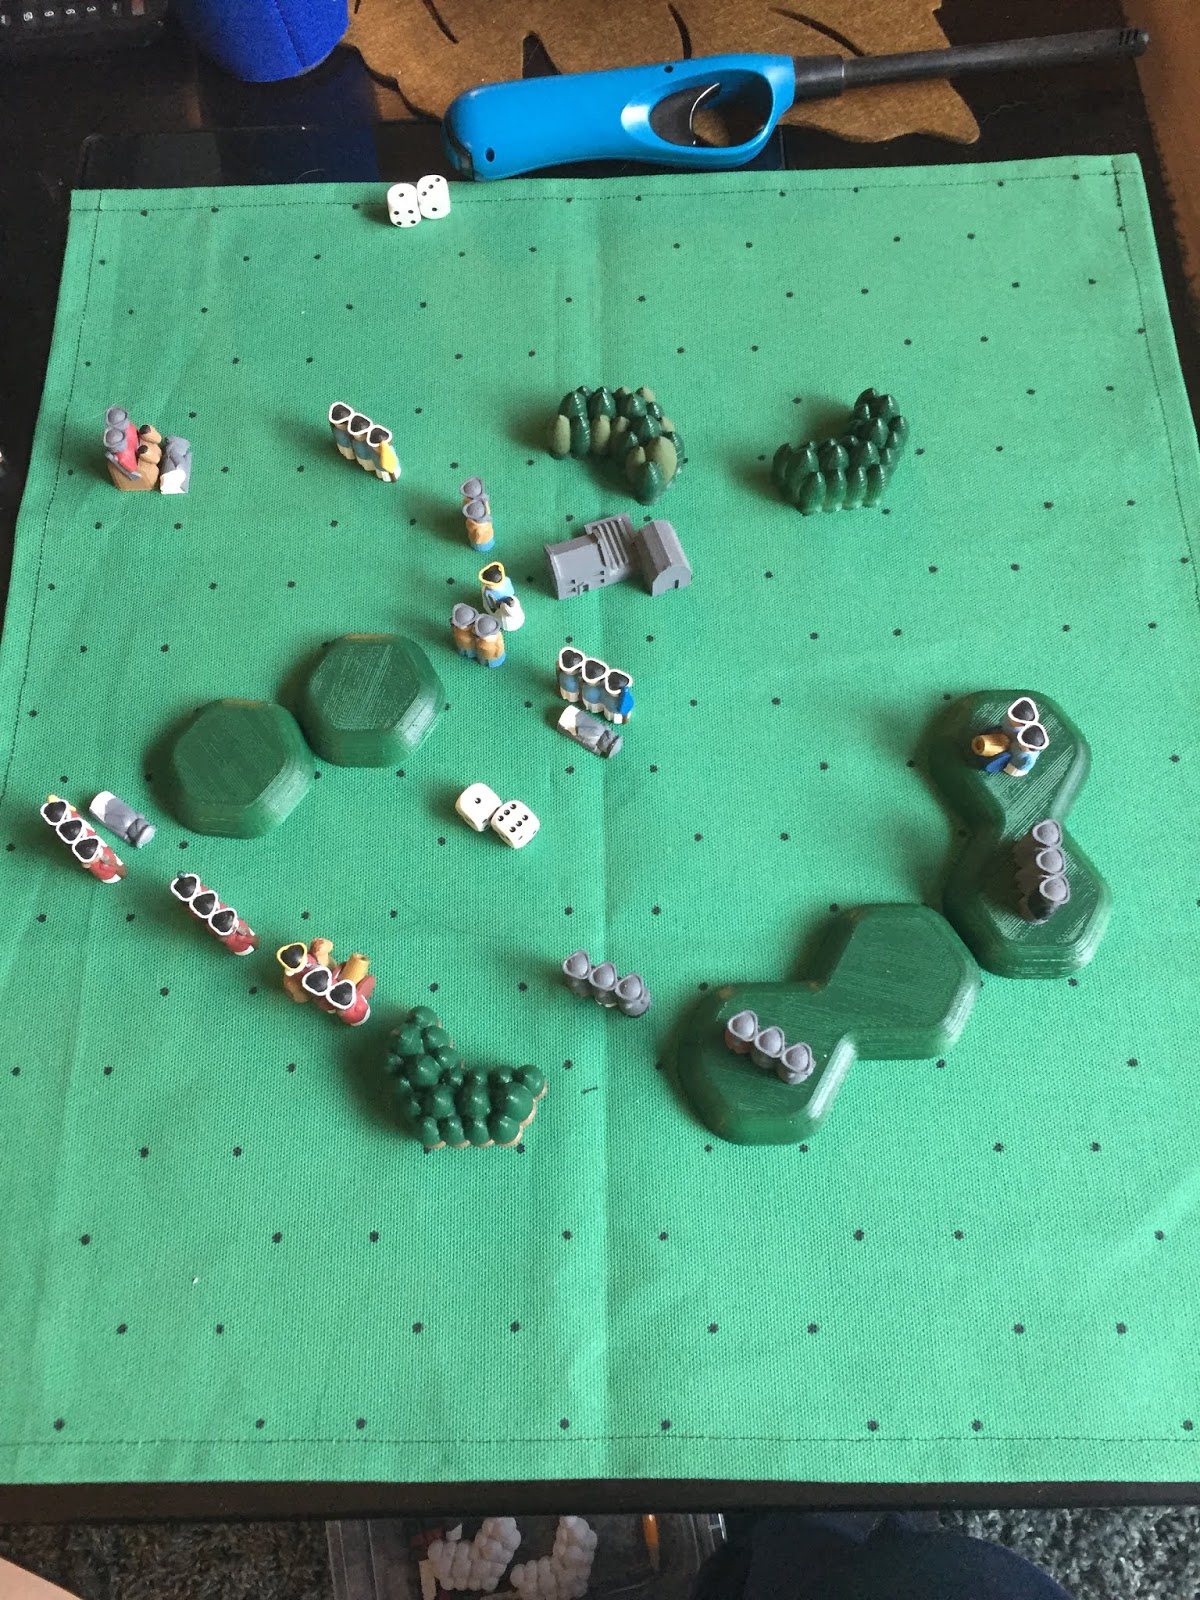
The following rules are roughly intended to fulfill the original intent of this blog.  These rules can be used for "Horse and Musket" operational level games.  The basic infantry units are intended to represent battalions.  They are designed to be grid based using a relatively small grid, perhaps 8x9 up to 9x12.  They are abstract enough for non-historians to play, but I think provide some historic feel. 
There are some admitted shortcomings that I hope to address after playtesting a few times.  My first edit will be to get the defender to have a roll/role (Pun Intended) in the combat process.  Currently the attacker is the only player to roll during combat.  The defender's bonuses simply count as negative modifiers to the attacker.  This mechanism makes it easier to play solo, but could leave a defending player feeling helpless.

I also need to devise some way of locking units into melee.  In many games (and in history), low quality infantry can be used to prevent the movement of higher value troops while cavalry swings around from the flank/rear, delivering a massive blow.  In my rules, melee ends at the end of the player's turn with a successful attack or a repelled charge.  This prevents combined attacks from multiple sides.

Please consider playtesting these for me and let me know what you think.  Also if you read through the rules and have questions or don't understand what I've intended to write let me know and I'll gladly clarify.  My end-goal is to have a set of rules that I can play with my friends who prefer board-games due to their simplicity and unambiguousness. 

Board and Scale:
The board should be gridded in either a hexagonal or square pattern.  Units should be able to fit entirely in a single grid.  If using a hexagonal grid, units face corners, not sides.  All ranges and movement is measured through sides. If using a square grid, units face sides and never corners.  All ranges and movement is measured through the sides.
Regardless of cell shape, all terrain impacts the entire cell.  Terrain should be movable so that units may establish any facing they choose. 
Turn Sequence
Determine Iniative Points
Artillery Phase
Player A Turn
Player B Turn


Determine Iniative Points
Roll 2D6.
Add or subtract relevant modifiers.
The modified result determines the number of IPs the player may expend this turn. The player who has a higher modified result chooses which player will be player A for this turn. 


Artillery Phase
Player A performs their artillery phase first, but because artillery fire is simultaneous, no effects will be felt until after the artillery phase.  If player A’s artillery fires on player B’s battery and destroys it, player B may still fire that battery this artillery phase.  Firing artillery consumes one IP.  Players fire as many artillery units as they wish.  Artillery which has fired may not move in the player’s turn.


Artillery Attack Process
Follow Combat Procedure to determine the outcome of shooting combat. 

Modifiers
+1:       Shooting into Flank/Rear
            Target within ½ of max range
-1:        Target in cover
            Attacking while disordered
            Enemy Commander adjacent to target

Player’s Turn
After the artillery phase Player A completes their turn. Once all of Player A’s IPs have been expended or forfeited, Player B activates their units.  Once both players have completed their player turn, a new game turn begins with an artillery phase.


Expending IP
IP are expended by activating or attempting to rally units. Players may never expend more IP than they were awarded.  Attempting to rally a unit costs one IP.  Activating a unit within two tiles of a commander costs one IP.  Activating a unit further than two tiles from a commander costs two IP.  Once activated a unit may; move, or move and then engage in combat.  Units may not engage in combat and then move unless they are moving to occupy a tile vacated as a result of melee combat.


 Rally Units
Only commanders may attempt to rally troops.  Commanders must be within two tiles of the unit they are attempting to rally.  If successful, a disorganized unit regains its composure and returns to normal status.  Attempting to rally consumes one IP, but does not prevent that unit from being activated.   


 Movement
Units may move up to their maximum movement, but may not exceed it. 
Certain terrain features negatively impact movement.  See the terrain section for details about each type of terrain. 
Movement for specific units is listed on the Unit Data Table.
Units may change facing as many times as desired in the process of moving, but must end their move facing a side of a tile. 
Units who only change facing, expend the number of movement points required to move into that tile.


Shooting
Activated units which have one movement point or more remaining may fire. 
Units must fire forward of their facing and may fire up to a 60 degree angle from directly forward. 
Units in built-up-areas have 360 degree firing arc. 
Units must have unobstructed LOS to the target
Range for specific units is listed on the Unit Data Table.
Follow Combat Procedure to determine the outcome of shooting combat. 


Modifiers
+1:       Shooting into Flank/Rear
            Shooting from cover
-1:        Target in cover
            Attacking while disordered
            Enemy Commander adjacent to target


Melee
Melee occurs when a unit attempts to occupy a tile currently occupied by an enemy unit. The attacking unit follows the combat procedure.  If the defending unit is eliminated or forced to retreat, the attacking unit may occupy the tile.  Although it may choose not to occupy the vacated tile, it must have enough movement to do so.  If the attacking unit is not successful in eliminating or forcing a retreat, it ends its turn adjacent to the defending unit.  An ordered attacker whose modified combat roll is less than six becomes disordered.  A disordered attacker whose modified combat score is less than six must retreat one tile, ignoring movement cost. 

Modifiers
+1:       Attacking into Flank/Rear
            Attacking from hill/forest to open
            Attacking artillery
            Commander adjacent to unit
-1:        Attacking from open to hill/forest
            Attacking while disordered
            Enemy commander adjacent to unit


Combat Procedure:
Determine that the attack is valid.
Attacker rolls 2 D6, adds modifiers and unit stats.
Consult the outcome of attack table below to determine how the defending unit must react. 


A failure is defined as a roll where the sum of the 2D6 and modifiers is less than 6.  A partial success has a modified sum between 7 and 9.  A total success has a modified sum of 10+. 
If the defender is unable to retreat into an unoccupied tile, it is eliminated. 

Terrain
Terrain is assumed to occupy the entirety of a cell.  This means that if any part of the LOS from one cell passes through closed terrain; forest, hill, or built-up-area, the entire LOS is blocked.  LOS is always measured from the center of the attacker's cell to the center of the target's cell.  If a LOS passes along the side of two closed cells, then LOS is blocked.  If LOS passes along the side of two cells and one is open, then LOS is not blocked. 

Open – Passable to all, no movement detriment, no cover
Forest – Passable only to infantry, costs additional movement point, provides cover, and obstructs LOS behind.
Hill – Passable to all, costs additional movement point, and obstructs LOS behind.
Built-Up-Area – Only infantry may end turn in BUA, provides cover, and obstructs LOS behind. When in BUA no flank/rear exists

Unit Data Table


Regular – Professional soldiers, organized into drilled battalions.  Two battalions can be organized together to form a regiment.  If the two battalions are adjacent, the regimental officer can issue a command to the other battalion, provided it is identical to the command given to him by the field general. 
Irregular – Professional or militia soldiers who fight in dispersed or skirmisher nature.  Irregular forces move through all terrain with a movement cost of 1.
Militia – Non-professional soldiers, organized into battalions.  They have some minimal training, but are not as proficient as regular battalions.  They have the same movement restrictions as regular infantry, but are never permitted to be organized into a regiment.    
Dragoons – Professional soldiers, functioning as light cavalry or highly mobile infantry.  Although they have roughly the same number of riders, they are less efficient than regular cavalry but can still deliver serious blows to irregular and militia infantry. The smaller number of soldiers makes them less efficient infantry units than battalions of regulars. Mounting or dismounting costs 1 movement point. When mounted, dragoons have the same movement restrictions as cavalry.  When dismounted, dragoons have the same movement restrictions as regular infantry.   
Cavalry – Noble sons, with substantial training.  Cavalry troopers are not armored knights, but can generally be trusted to disperse enemy formations, especially if they can charge from the flank/rear. 
Artillery – Batteries of professional gunners.  Although the guns are generally assigned to the regiments they serve, they are often grouped together and separated from their regiments to form combined batteries. 
Commanders – Appointed leaders of the army. Commanders move as cavalry, but do not have any combat ability on their own.  If attacked, the Commander may choose to retreat away from the attacking unit.  If the defending commander voluntarily retreats, the attacking unit may choose another target and roll with a +1 modifier for that turn.  Units adjacent to their commander experience a morale boost, making them more resistant to attack and more deadly in melee.


Army Composition
Army composition varied widely based on time and location.  This set of rules could likely encompass the War of Spanish Succession through the Napoleonic Era.  Players should take into consideration the historical or unhistorical setting and playing space to build their armies accordingly.
Eight units per player should play well on a 8x9 size grid. 

Wednesday, May 16, 2018

It's been a while

I know I haven't posted in a long time.  It's been a busy time in my life with little time for this hobby of mine.  My life has been a lot more time consuming, and my other hobbies take priority over this one.  I'm currently working on two "wargaming" projects.  The first is the ongoing quest for a quick, simple, horse and musket, grid based wargame with miniatures.  I'm re-tweaking One Hour Wargames and The Portable Wargame, with a different combat system. 
I think  summing 2D6 and modifiers should provide some amount of predictability with an appropriate level of uncertainty.  In my last "completed" rules, I kept watching my elite cavalry's charges stopped by gun crews.  If the sum of 2D6 with modifiers is 10+ something very good happens for the attacker.  If the sum is 7-9 something good happens, but if the sum is <6 something bad happens.  Summing the dice before adding modifiers creates something that can approximate a normal curve.  This makes the effects of modifiers more uniform compared to determining outcomes based on rolls being above or below set values i.e. hit on 4+. 
My reworked rules will have commander units which can make troops near them more potent.  Units in the game will also have only two states of damage; Order and Disorder.  Having lots of bases making up a unit goes against my desire to keep the game compact and cheap, and having units trail a set of dice clutters the board too much for my liking.  Commanders will also be able to rally disordered units back to ordered.
The other project I'm working on is Tech?No! Bowl.  It's a football (American) simulator board game.  One of my coworkers is excited to play it and it might help transition him into more traditional wargames.  Tech?No! Bowl is very difficult to find in print, and expensive if you can find it.  I was able to find the rules for sale online from a reputable source for a reasonable price. I'll be designing 3D printing most of the pieces.  The game's designer sells boards and some of the other important pieces for a reasonable price.  The pieces I've finished can be found at the following link.
https://www.thingiverse.com/thing:2883378
I'm planning on going camping over the Memorial Day weekend, so hopefully I can get the horse and musket game playable by then.  I'm looking forward to getting back to this and posting pictures of games soon.

Thursday, March 8, 2018

Modular Shipyard

I've been working on a set of ships for Galleys and Galleons.  I'm thinking about doing a naval campaign and would need a variety of ships in different sizes/capabilities.  The following ships are made from the same pieces, but arranged in different ways to create a variety of ships.  I know that these are not remotely precise models, but they print relatively easily on my 3D printer and don't require much effort to paint. 
This shows just how different looking the ships can be, even though they're made of the same parts.  The small ship is 40% of the length of the large one.

This "galleon style" ship might be used to represent large ships. The number of cannons can be adjusted to represent a wider variety of ships. The green deck can be extended backwards or forwards to give each ship in the fleet a unique characteristic.   

This ship might be a small warship, a sloop, caravel, or other medium size ship as described in the Galleys and Galleons ruleset.  
I am in the process of designing triangular sails to allow them to be played as lateen rigged ships.